
Bed assembly
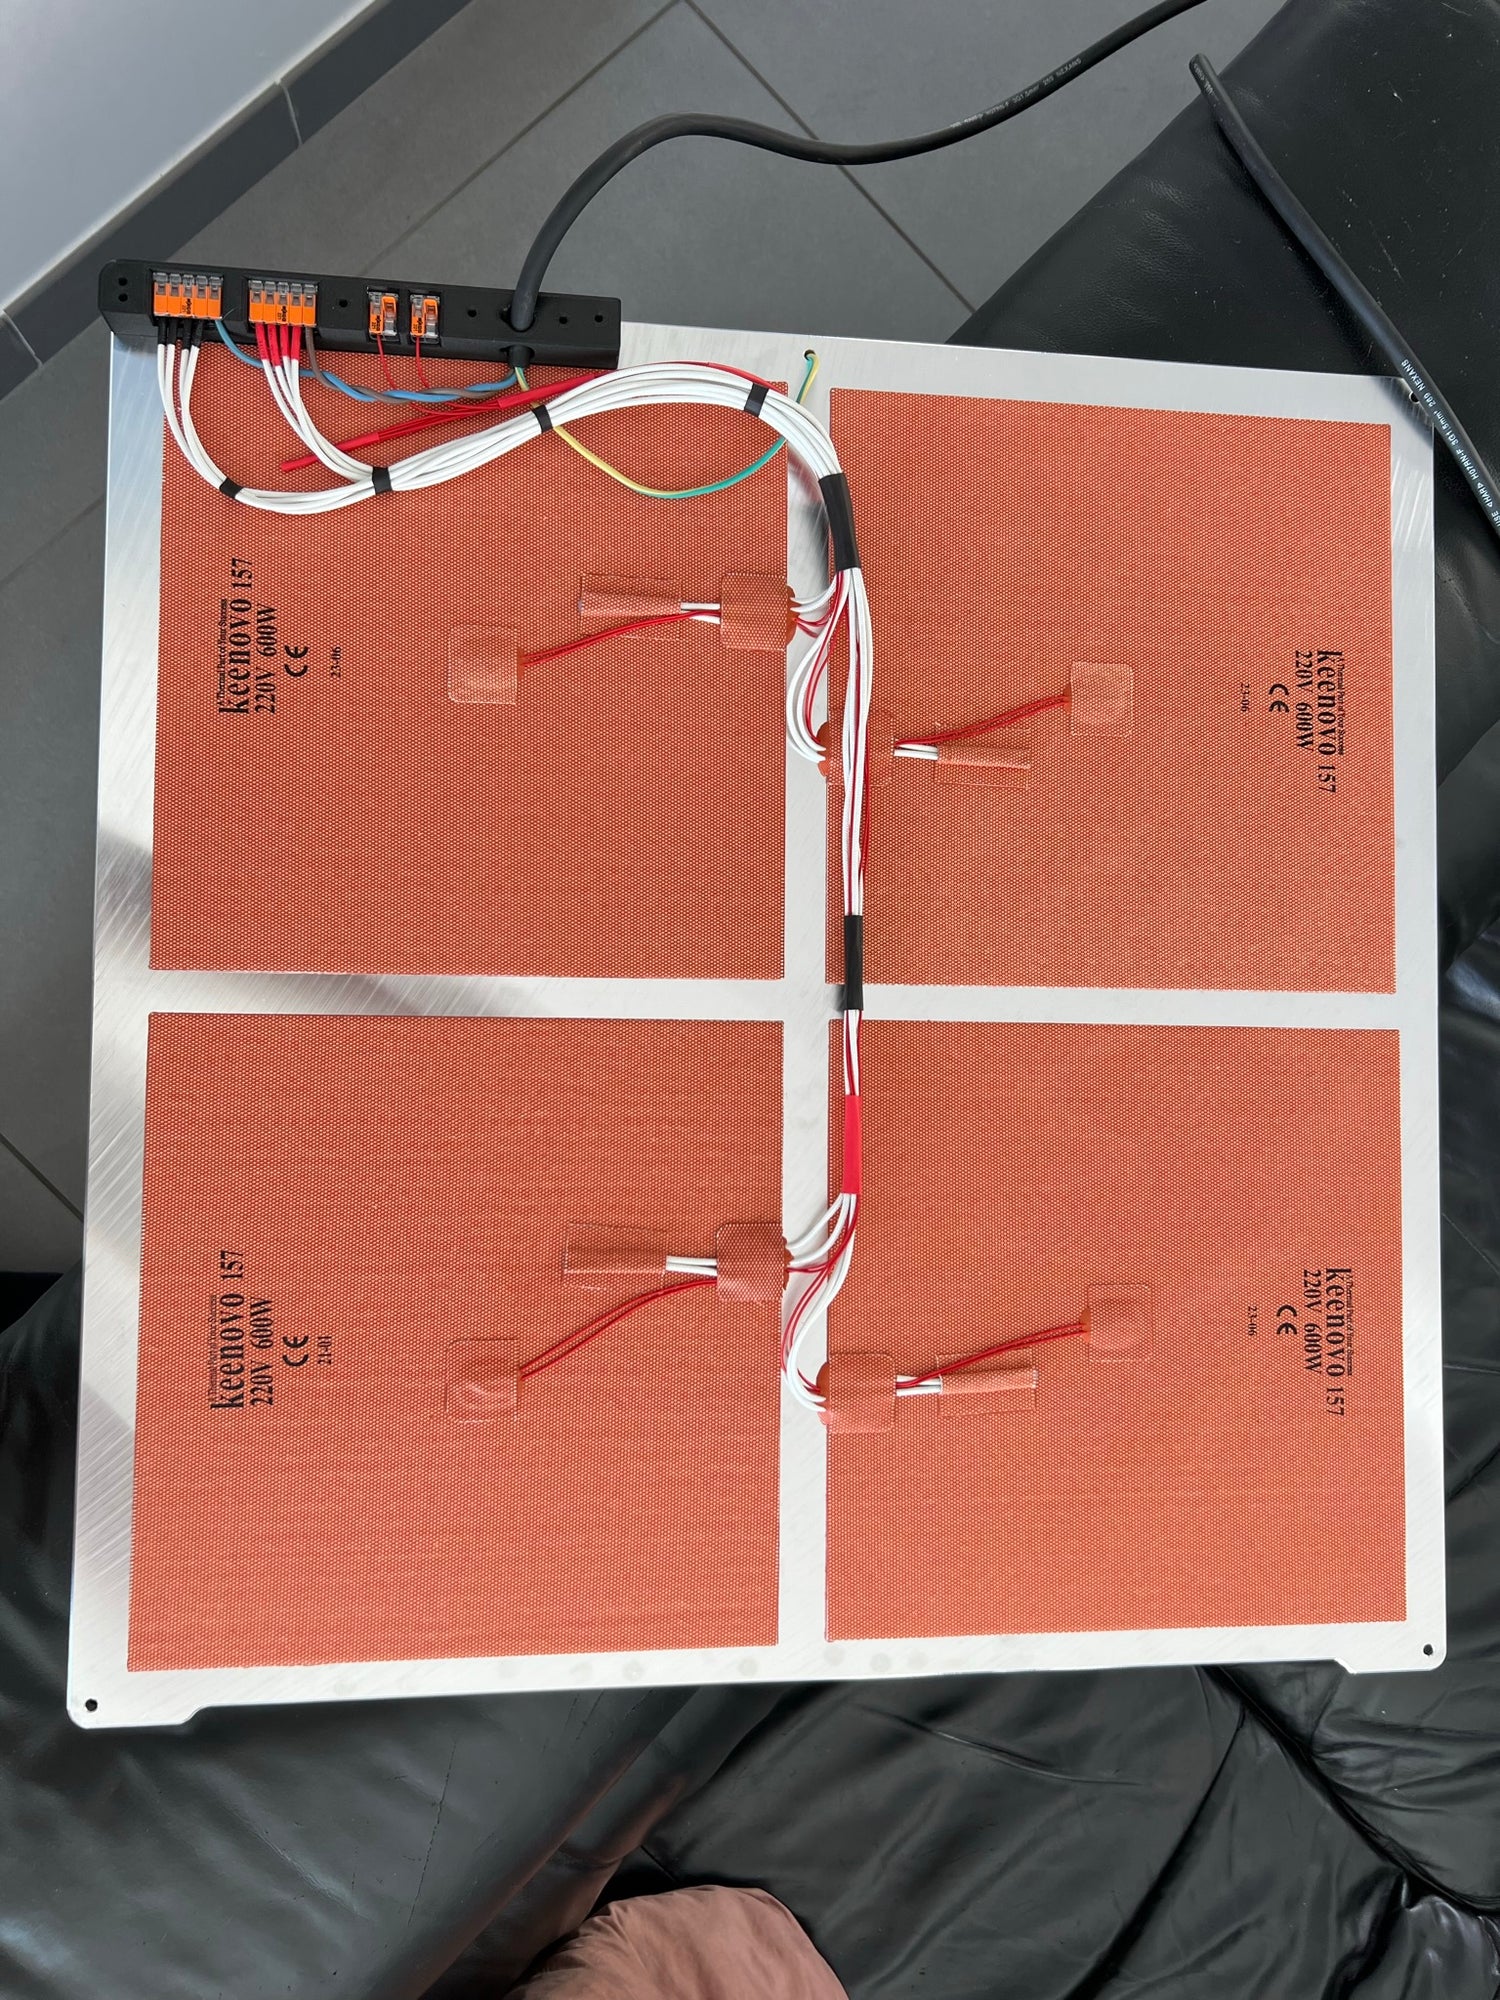
Here we start with the bed adaptation, made by SpannSystem in Austria, a 10mm Alu casted bed 635x635mm with embedded magnets, surfaced to a high precision flatness. I choosed 4 silicone heater mat from Keenovo, 600 W each linked in parallel
-

Then came the insulation of this 2400W bed, to be as energy efficient as possible? A thermal silicone potting first...
-

.. then a full alu-foam cover
-

Some PEI tape to close the system. Here can be seen the addition of a full grounded harness capable of handling 16A + the bed thermistance


Frame Assembly
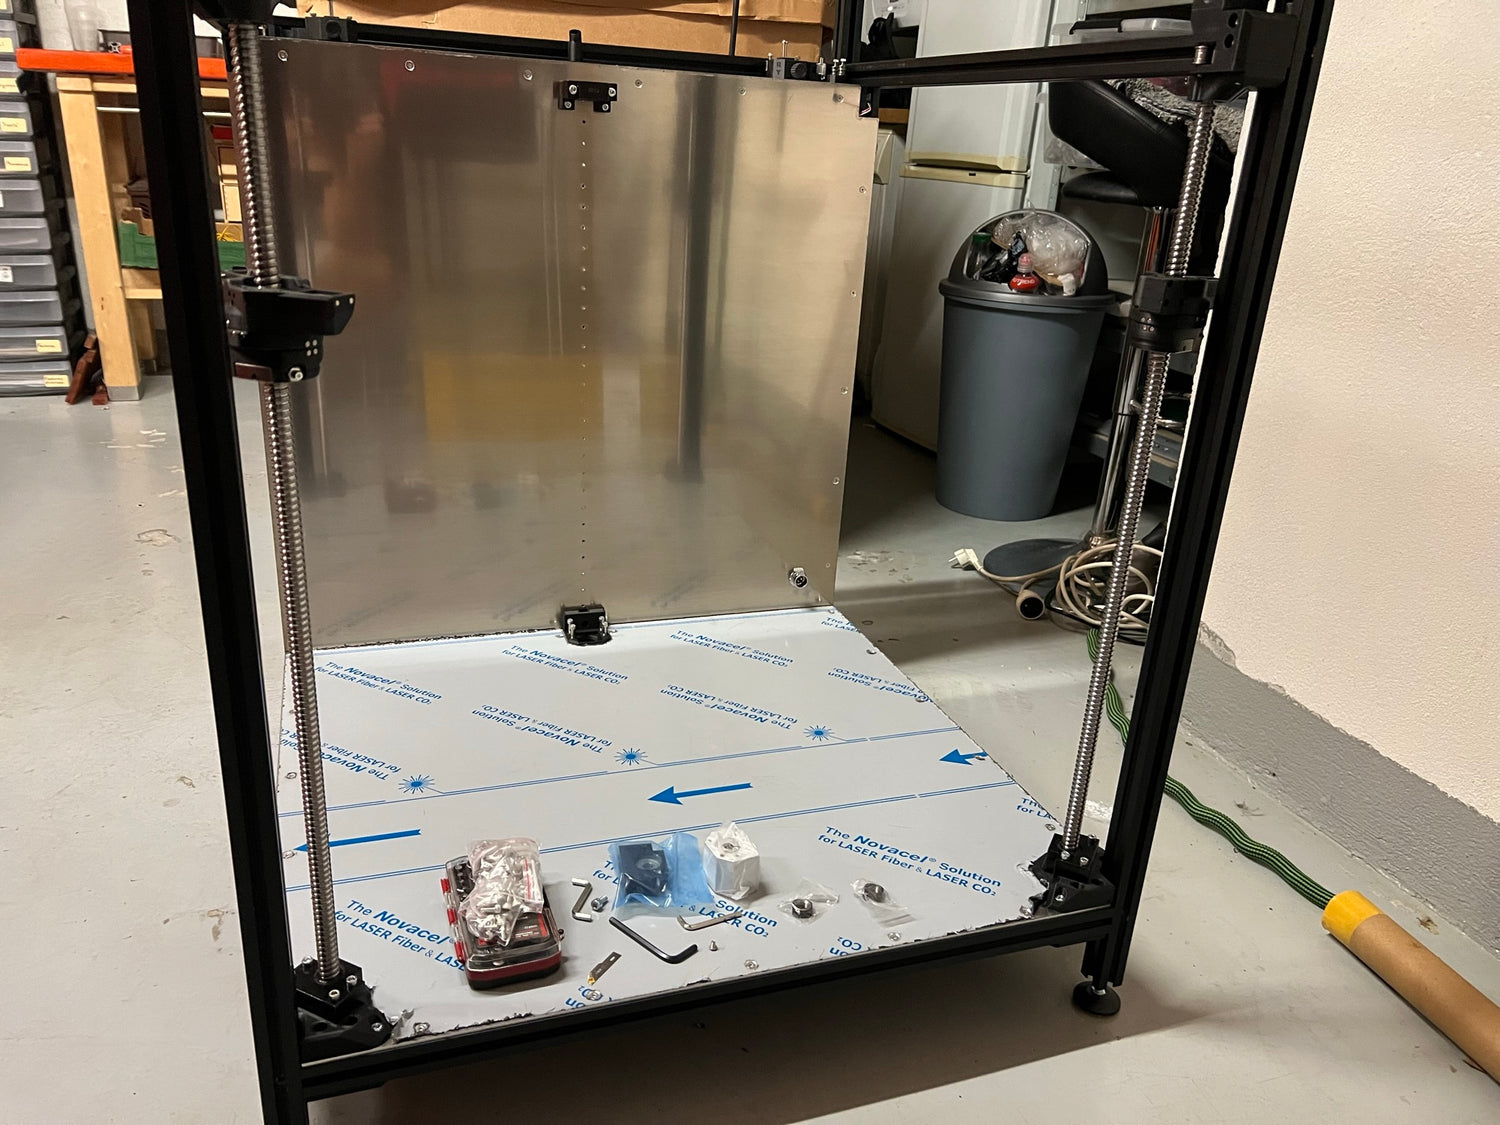
Like the previous Vulcain prototype, I used 30x30 alumium extrusion with a blind join mounting, giving me a quick and effective squareness. Everything is then reinforced with hiden corners, small corners, and the 2x 3mm aluminium plates at 90° add a tremendous stiffness. Note here that found to 40x40 or 30x60 could be a better idea to further increase the overall stiffness along Z
-

Frame base
-

Countersunk drilling
-

-

-

-


Z-Upgrade v2.5 assembly
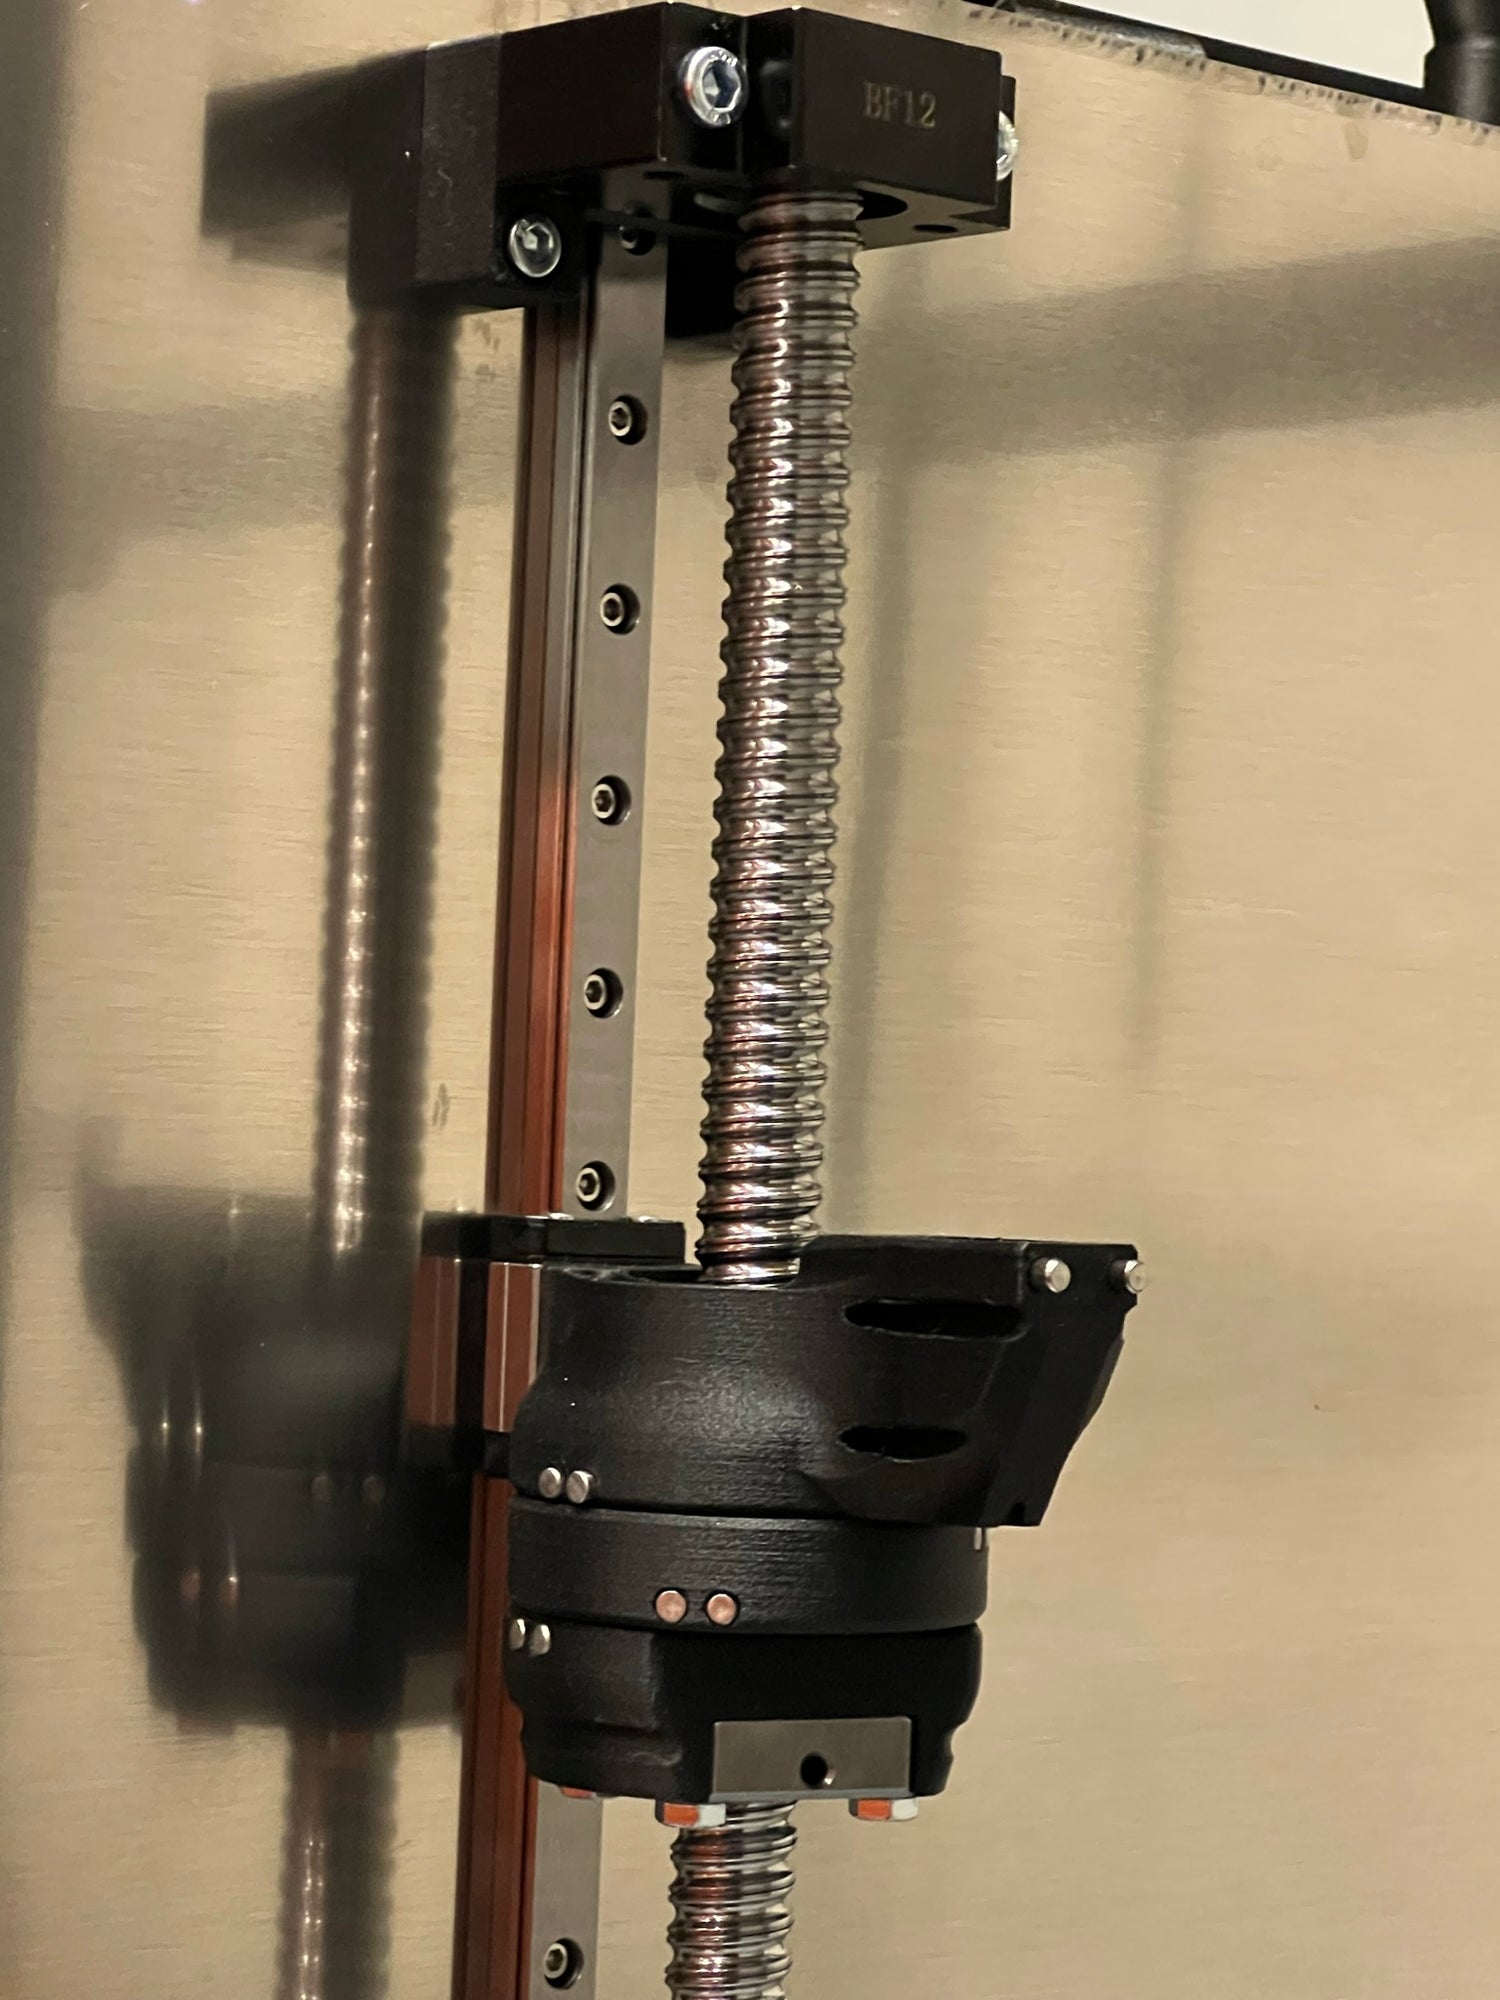
For this build a small variation of the Z-Upgrade has been done, since the bed is 18Kg almost; Pin majoration from 3mm to 4mm, Reinforced middle rings. The Oldham mechanism her is capable to withstanc 2.4mm of variation, and as the other Z-Upgrade variation, completly supress any wobbling potential
-

-

-

AWD inclusion


-

-

NEMA 23 is used for Z to counter any drawback of low maintening torque when motors are off
-


BRS-AWD 1.35a
AWD make sense here since we want to have a good acceleration and relay over the belt lenghts
-

-
-

Last patch here, a reinforced mount to add stifness over the assembly


Gantry, Toolhead, harness
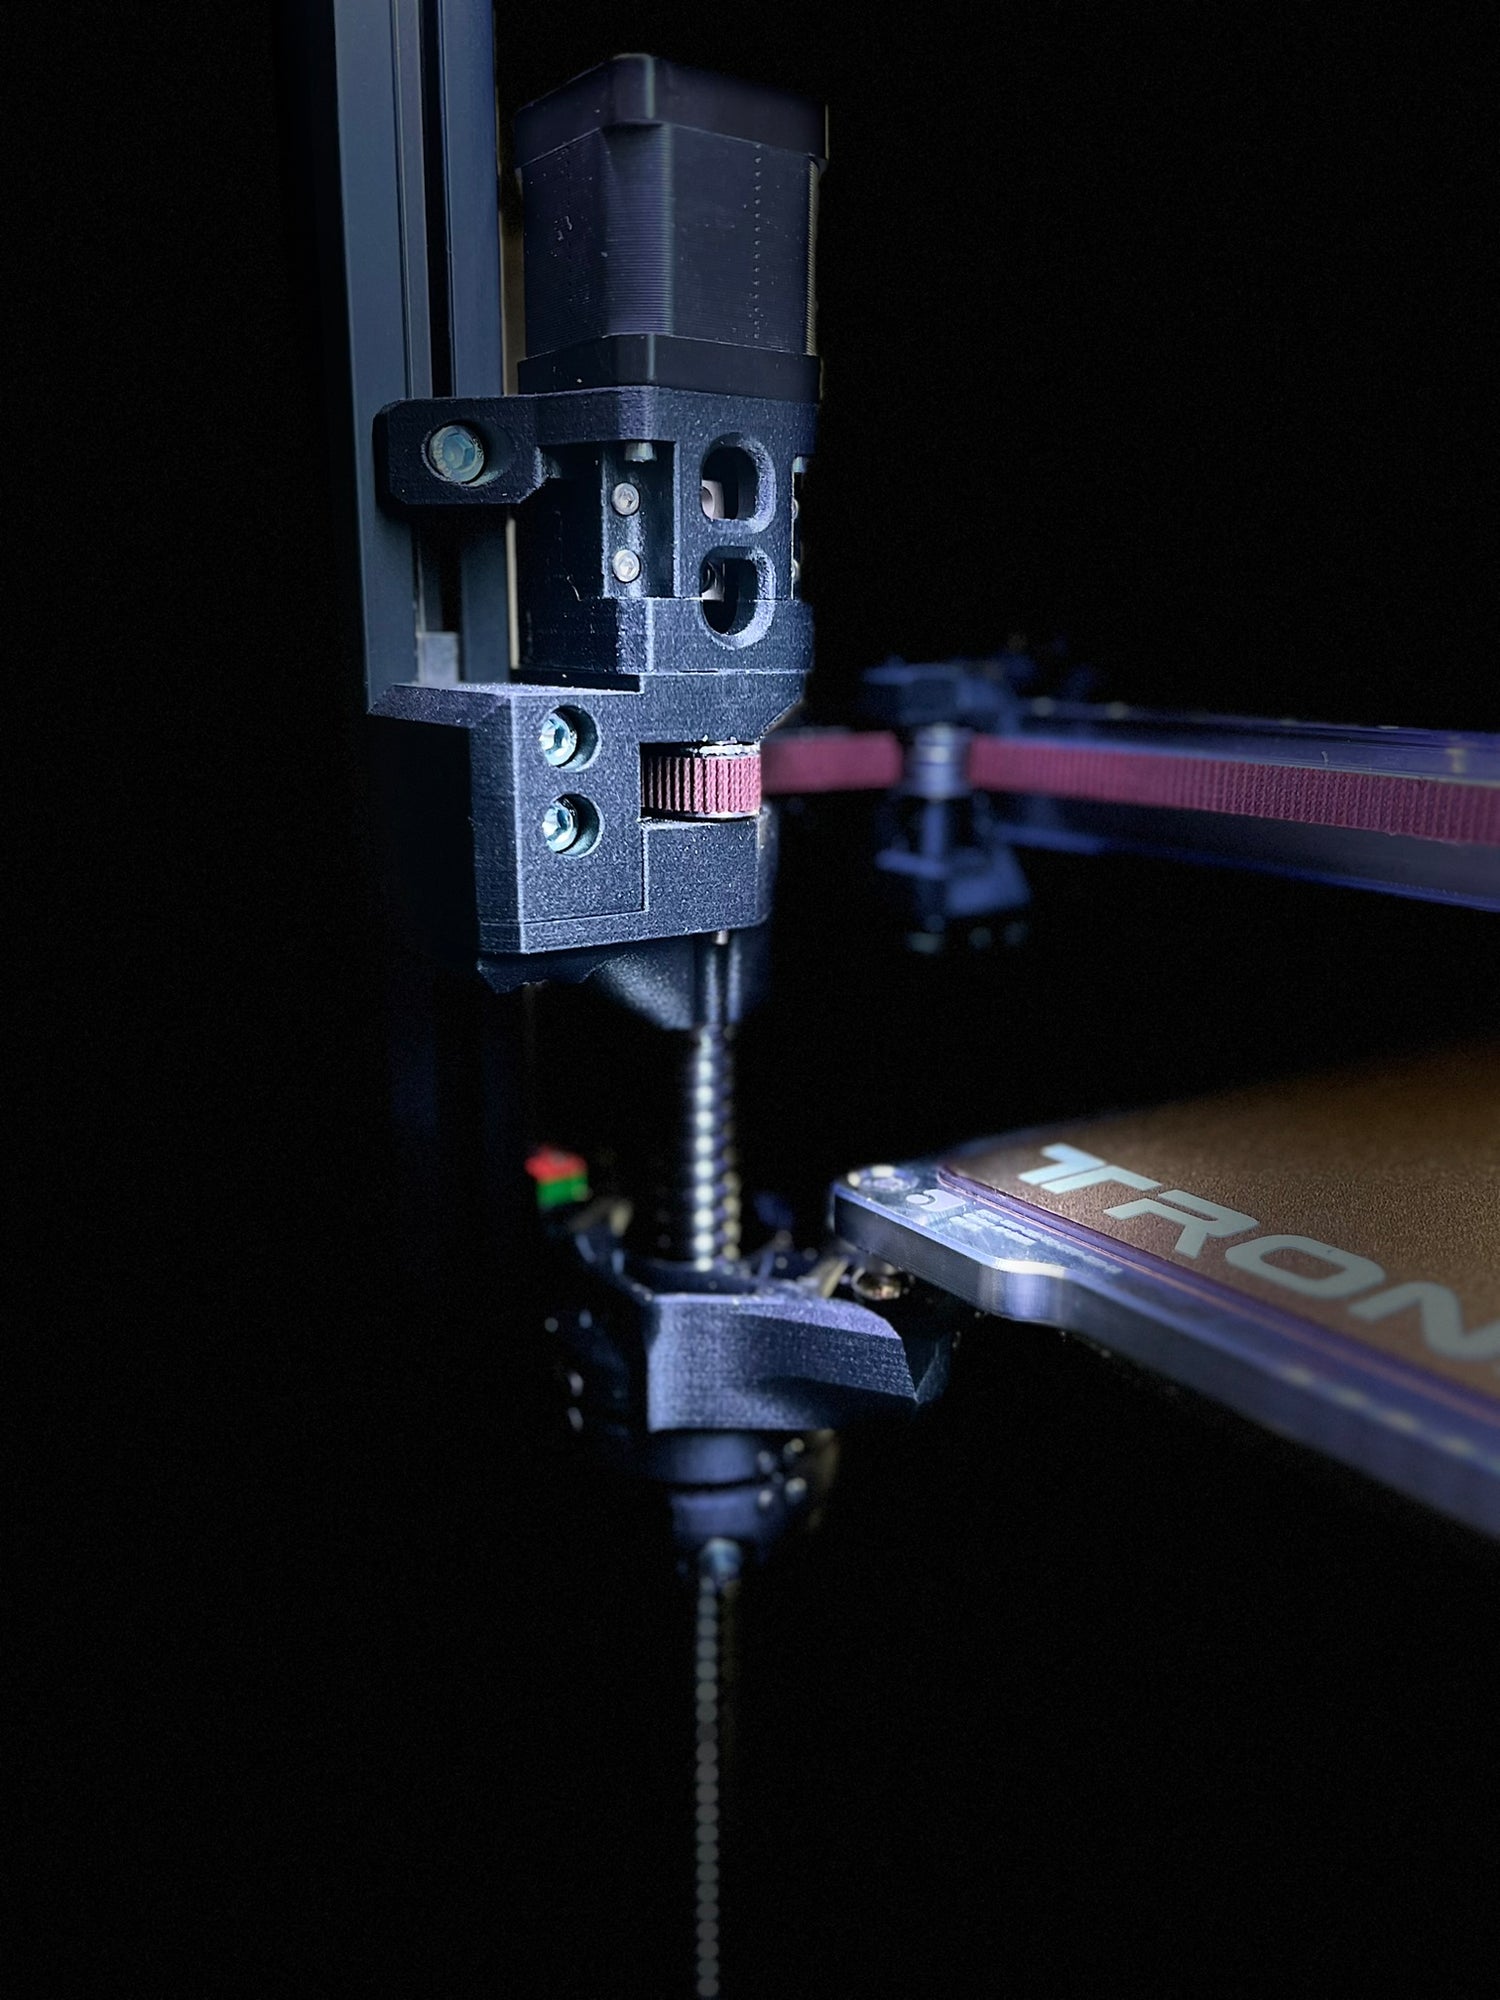
The choice was obvious here: a Vz extruder + Goliath + Vz Carriage over an aluminium tube. The only difficulty was to handle a long harness, with cables, and CPAP Tube.
Gantry


Harness
-

A long distance to cover
-

I use retractable wires (2) to hold the harness in a correct way to fold itself on motions without hiting anything
-

-


Assembly ends
Once everything has been finished, time to close the assembly of this machine for the first tests
-

Wiring done (electronic bay will not be detailed here)
-

Screen integration
-

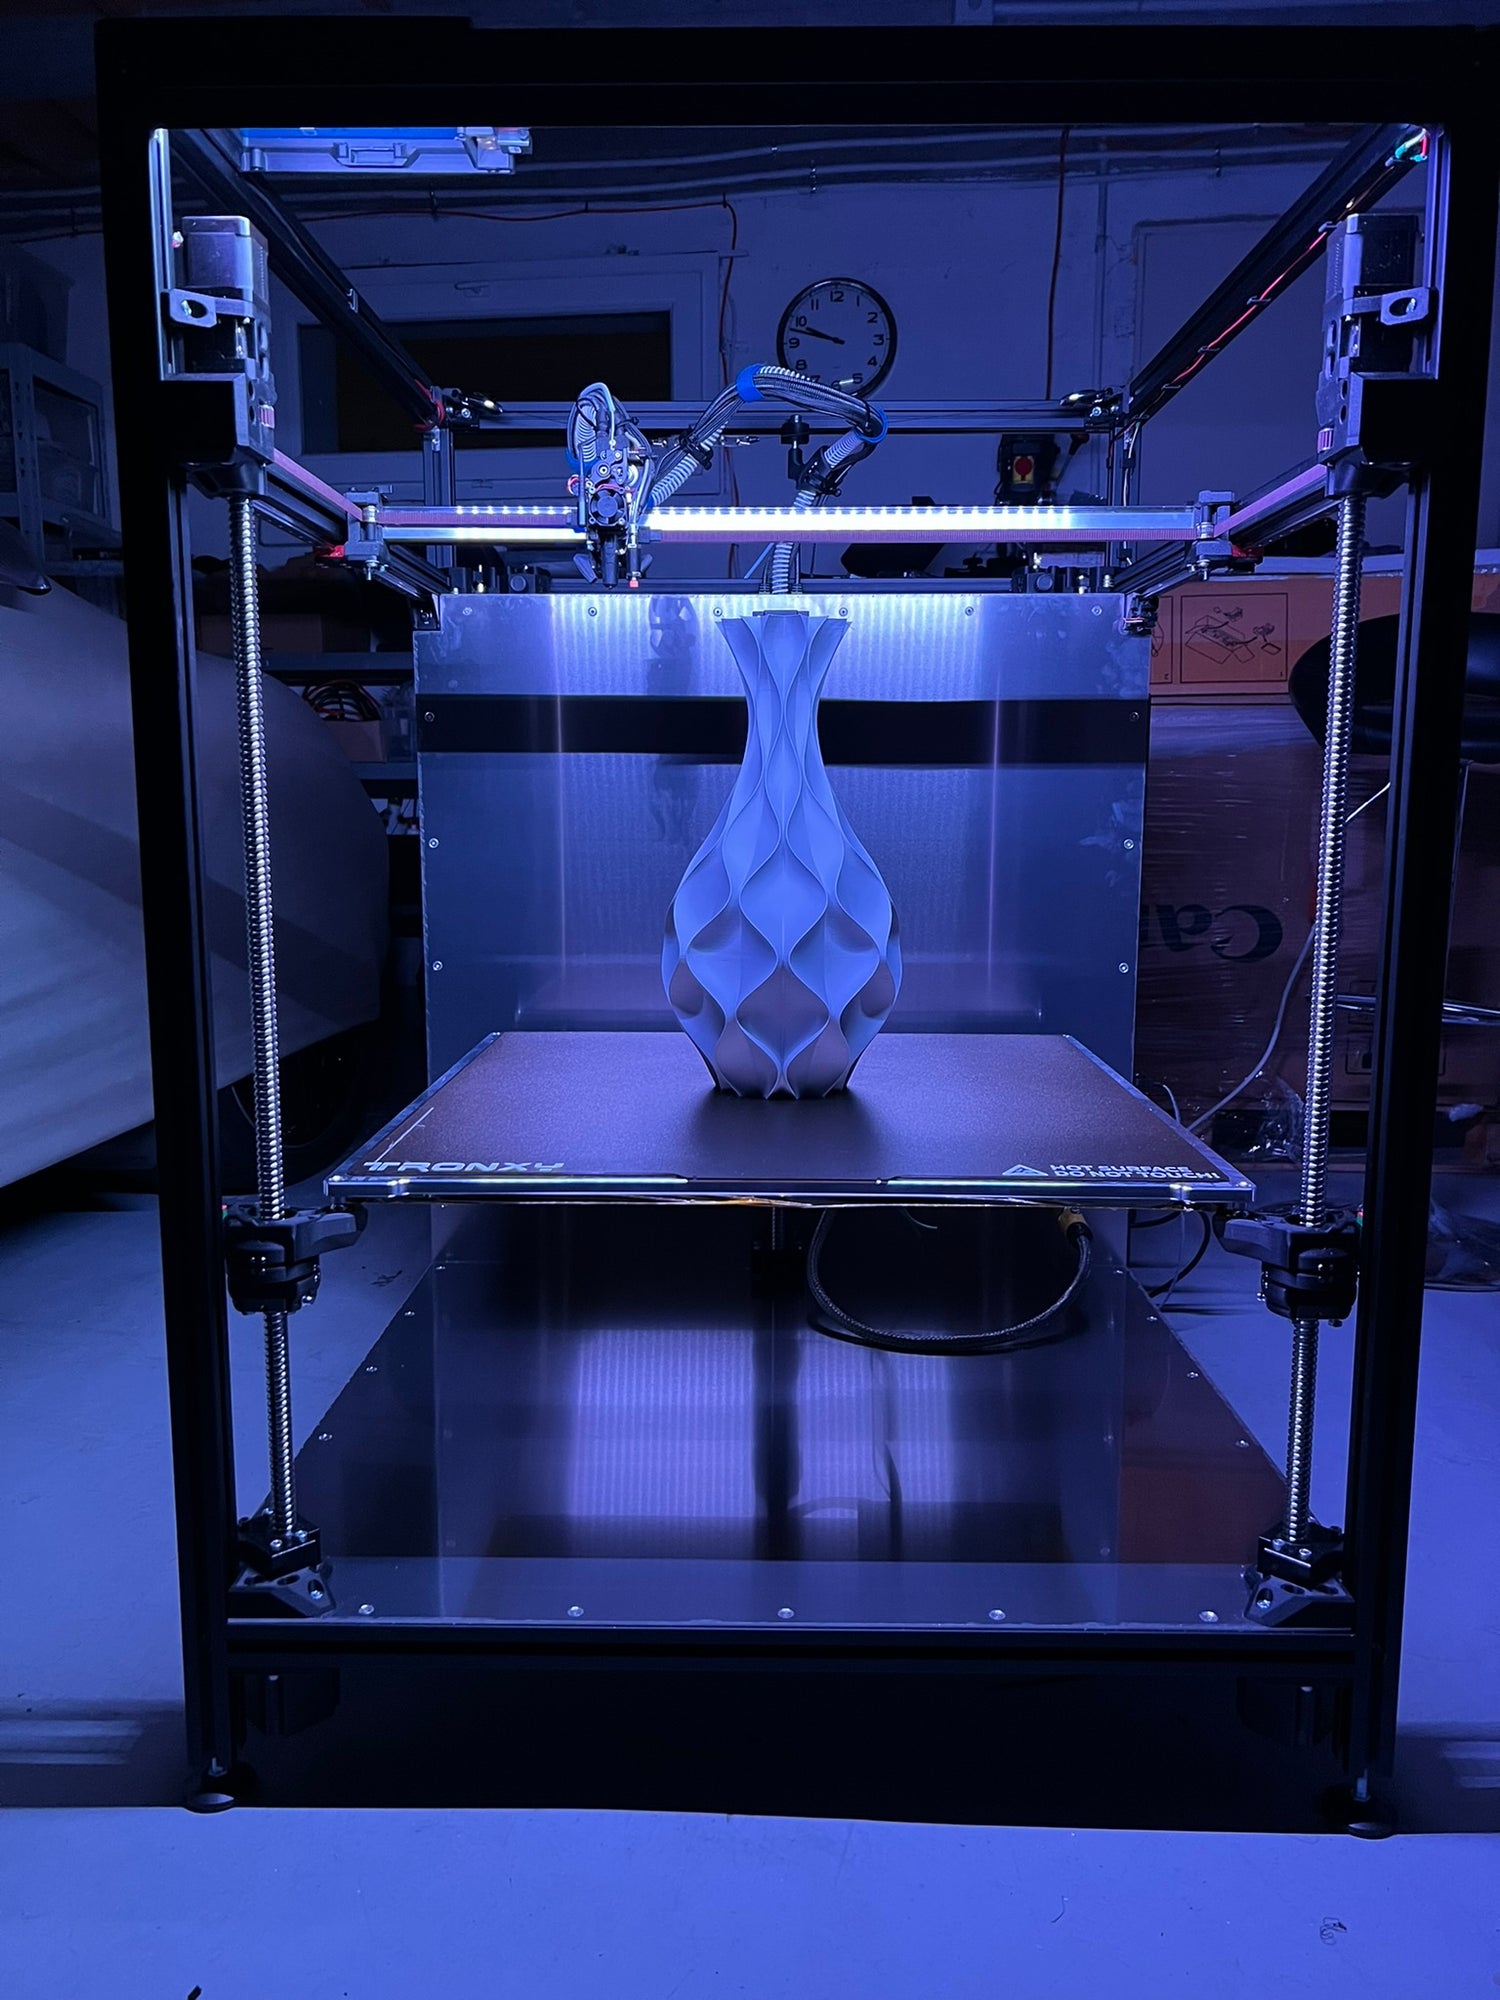
Led Integration, first power On


Input Shaper
-

X
Some of the artifacts are mainly due to the ADXL345 position. Even if the place wasn't the best, it fits the toolhead and provide a correct reading. As far as it is, I'm OK with those results, considering the 12600 value is quite insane on a 600 machine. Thanks to the AWD.
-

Y
Clear unspreaded spike

